Adding subtitles in VLC is usually simple, but the small details matter. A subtitle file can be present in the same folder as the video and still fail to appear if the track is disabled, the file name is confusing, the encoding is wrong, or the timestamps belong to a different release.
This guide focuses on a practical VLC subtitle workflow: load the file, confirm VLC is using the correct subtitle track, test sync, then repair the subtitle file if the player is not the real problem. It is useful for SRT, VTT, ASS, and other common external subtitle files.
The goal is not just to make captions appear once. The goal is to prepare a reliable subtitle file that can be reused in VLC, other desktop players, websites, and translation workflows without mystery errors.
How VLC decides which subtitle file to show
VLC can load subtitles manually from the Subtitle menu or automatically from the video folder. Automatic loading works best when the video and subtitle share the same base name, such as movie.mp4 and movie.srt. If several subtitle files sit beside the video, VLC may select a track you did not intend to use.
The player also separates the act of loading a file from the act of displaying a track. If a subtitle file is loaded but the active subtitle track is set to disabled, no captions appear. That creates a common false alarm: people think the SRT is broken when the selected track is simply off.
If text appears as boxes or strange characters, the timing may be fine but the file encoding is wrong. This is common with Arabic and other non-Latin scripts. Re-saving the file as UTF-8 or cleaning it with a browser-based subtitle workflow often fixes the display problem.
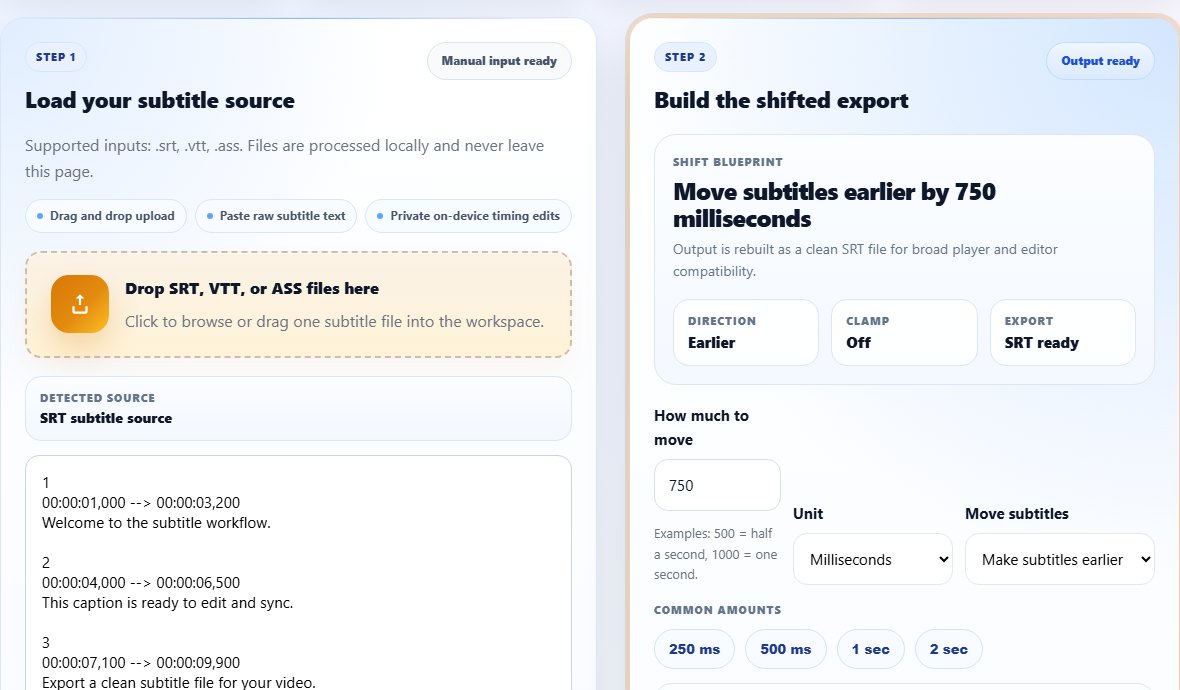
When VLC shows captions too early or too late, treat that as a timing issue rather than a loading issue. A small constant delay can be fixed with a shift. A subtitle that becomes worse over time may belong to another video version or frame rate.
Keep one subtitle file beside the video while testing. Multiple files with similar names make it harder to know which track VLC is actually reading.
1
00:00:03,200 --> 00:00:06,100
Welcome back to the lesson.

2
00:00:06,400 --> 00:00:09,000
Today we will add subtitles in VLC.
Step-by-step: add subtitles in VLC
Use this sequence before changing deeper VLC preferences. It separates player setup from subtitle-file repair, which saves time when the file itself is not broken.
Put the video file and subtitle file in the same folder.
Rename the subtitle so the base name matches the video, for example lecture.mp4 and lecture.srt.
Open the video in VLC, then choose Subtitle > Add Subtitle File if it does not load automatically.
Open Subtitle > Sub Track and select the subtitle track instead of Disable.
- Put the video file and subtitle file in the same folder.
- Rename the subtitle so the base name matches the video, for example lecture.mp4 and lecture.srt.
- Open the video in VLC, then choose Subtitle > Add Subtitle File if it does not load automatically.
- Open Subtitle > Sub Track and select the subtitle track instead of Disable.
- Jump to the first spoken line and check whether the caption appears at the expected moment.
- If captions are late or early by a fixed amount, repair the file with the Subtitle Shifter.
- If the text is unreadable, save the file as UTF-8 or clean the subtitle before loading it again.
- Test a few points near the beginning, middle, and end before sharing the file.
Practical examples
Real subtitle work usually fails at boundaries: the first spoken line, a scene change, a translated phrase that becomes longer, or a platform upload that expects a different format. Use the examples below as a quick quality check before you export.
A movie file and one matching SRT file should load automatically in VLC when both use the same base name.
For a long lesson, test captions at the start, middle, and end so you catch timing drift before sending the file to students.
If a translated file uses Arabic, Chinese, or another script, check encoding before assuming VLC has a rendering bug.
The video opens, the subtitle file is nearby, but VLC shows no captions or selects the wrong language.
The matching SRT track is selected, readable, and tested against several spoken lines.
Common mistakes to avoid
Most subtitle problems become harder when the source file is edited without a plan. Keep an original copy, make one focused change at a time, and test the output in the environment where viewers will actually use it.
- Leaving the active VLC subtitle track set to Disable.
- Keeping several old subtitle files in the same video folder during testing.
- Renaming the video but not renaming the subtitle file to match.
- Blaming VLC for unreadable text when the real issue is character encoding.
- Testing only the first caption and missing drift later in the video.
- Burning subtitles into a video before proofreading the external SRT.
Conclusion
VLC is forgiving, but clean subtitle habits still matter. A matching file name, one active track, readable encoding, and a quick sync check solve most playback problems without touching advanced settings.
Once the subtitle file behaves correctly in VLC, keep that clean copy as your source. You can edit it, translate it, convert it to VTT, or merge it with other parts without starting again.
Related tools
Use these TranslateSubtitles.net tools when you are ready to apply the workflow from this guide.
Related guides
FAQ
Why are subtitles not showing in VLC?
The track may be disabled, the file may not be loaded, the file name may not match, or the subtitle file may contain invalid timestamps or encoding problems.
Does VLC support SRT subtitles?
Yes. SRT is one of the most common external subtitle formats for VLC playback.
Can VLC load subtitles automatically?
Yes, automatic loading works best when the video and subtitle share the same base name and are stored in the same folder.
How do I fix subtitle delay in VLC permanently?
VLC can adjust delay during playback, but editing or shifting the subtitle file creates a reusable fix for future viewing and sharing.